
Don’t Make These 9 Mistakes With Peel-and-Stick Wallpaper

It’s simple to install peel-and-stick wallpaper if you avoid these 9 common mistakes. You’ll love being able to decorate your walls without the mess, fuss, or commitment of traditional wallpaper!
Do you have somewhere in your house that needs a little something extra?
Maybe a little pattern?
But you don’t want to make the kind of long-term commitment traditional wallpaper requires.
Because if you’ve ever tried to remove old pasted-on wallpaper, you know it’s a c-h-o-r-e!
And you’re probably very hesitant about ever putting it back up again…

Fortunately, there are tons of gorgeous peel-and-stick wallpaper patterns that give you the pizzazz you’re craving.
It’s surprisingly easy to hang when you follow these tips!
However, I was still pretty nervous to hang wallpaper for the very first time, so I tried doing it in my small walk-in closet.
I learned a lot, and am planning some other places to use this simple DIY project.
- Great Sources for Peel-and-Stick Wallpaper
- Peel-and-Stick Wallpaper Mistakes
- Mistake 1: Not Prepping the Walls
- Mistake 2: Neglecting to Mark a Plumb Line
- Mistake #3: Not checking the seam allowance before cutting each piece
- Mistake #4: Not Marking a Cutting Line
- Mistake #5: Removing all the Backing at Once
- Mistake #6: Not Smoothing Out Air Bubbles and Seams
- Mistakes #7 & #8: Not using a straight edge or Using a dull blade to cut the overage
- Mistake #9: Sweating the Small Stuff
- Before and After Hanging Wallpaper
- Resources and Supplies
Posts on Simply2Moms may contain affiliate links which means we may earn a small commission on purchases at no extra cost to you. As an Amazon Associate, I earn from qualifying purchases. You can read our full disclosure policy here.
Great Sources for Peel-and-Stick Wallpaper
There are so many great places to get peel-and-stick wallpaper!
Here are some places to find the perfect pattern for your project:
- Spoonflower makes tons of gorgeous patterns that are tear-resistant and this renter-friendly wallpaper won’t leave any residue behind when you remove it.
- Wayfair has over 20,000 patterns so you’re bound to find the perfect one for your project! You’ll be able to find a variety of price points too.
- Walmart is another great source for affordable peel-and-stick wallpaper patterns. I really like the Better Homes and Gardens line!
- Amazon is where I purchased the vinyl removable wallpaper I used for this project.
Peel-and-Stick Wallpaper Mistakes
So you’ve decided to jump in and hang removable wallpaper in your home.
Before you start installing it, be sure you read all the instructions on the packaging because every brand may have some different recommendations.
Here are some other mistakes to avoid so you get the best results possible!
Mistake 1: Not Prepping the Walls

Even though peel-and-stick wallpaper is removable, you want it to adhere well for as long as you love it.
For best adhesion, walls should be smooth and clean.
You should also repair any holes first.
Mistake 2: Neglecting to Mark a Plumb Line

No matter how old or new a house may be, odds are it isn’t completely plumb.
To make sure your wallpaper’s pattern is straight and level, always start by marking a plumb line on the wall using a level.
I find that 2-foot Level is easiest to use to mark this line.
Then use that straight, level line to line up the edge of the wallpaper.
Not taking the time to start with a plumb line will mean that your pattern will end up being crooked.
Even if this wallpaper is removable, you still want it to look straight for as long as it’s on your walls, right?!
Mistake #3: Not checking the seam allowance before cutting each piece

When you measure the length of your wall, that is likely not the length that you need to cut the next strip!
Before you make that cut, bring in the wallpaper, line up the seam, and see how much extra you need to add on to the measurement for the length of the wall.
Mistake #4: Not Marking a Cutting Line

Many wallpapers have markings on the back to help you cut a straight line.
But even with those markings, it’s easy to get off track and end up cutting the line a little wonky.
The words on the back of my peel-and-stick wallpaper made it hard to go precisely from one marked line to the next.
I found I got much more consistent results by drawing a line to follow.
Simply use a long straightedge to help you draw the line.
Mistake #5: Removing all the Backing at Once

Even though peel-and-stick wallpaper is relatively affordable, you don’t want to ruin an entire strip by having it stick to itself!
Some papers are stiffer than others, but it’s still very easy for the paper to fold over on itself and stick, which isn’t an issue with paste-on papers.
Also, instead of removing the backing from the top down, start by removing the corner on the edge where you’re matching a pattern.
Slowly pull the backing away at an angle, lining up a foot or two of the pattern along the seam.
Then, pull the backing down from the top and smooth out any bubbles.
Work in small sections to get the best results.
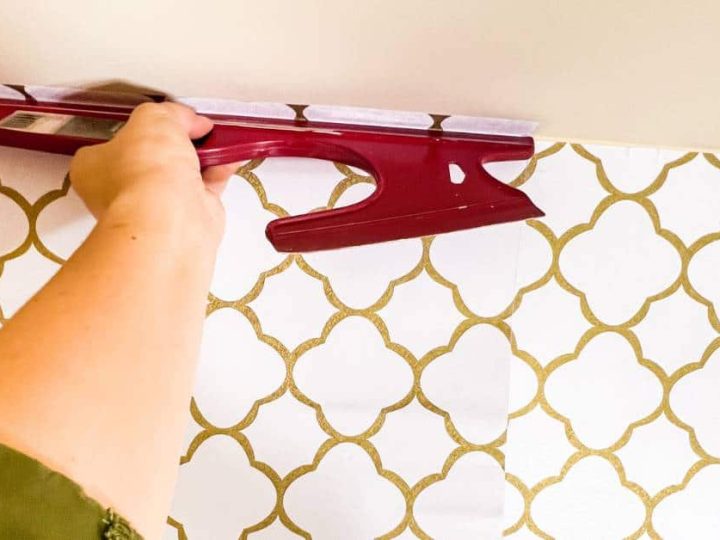
Mistake #6: Not Smoothing Out Air Bubbles and Seams

No matter how carefully you apply the wallpaper, there will always be some air bubbles.
Be sure to smooth out those bubbles as you go to get the best results.
Some wallpapers are more likely to tear than others, so you may want to use a Straight Edge Smoother with Felt Edge to reduce the chance of the paper tearing or ripping during the process.
If you notice that the seams aren’t lying as neatly as you’d like, you can use Seam Roller to help them adhere better.
Mistakes #7 & #8: Not using a straight edge or Using a dull blade to cut the overage

When you cut the overage that happens from lining up the seams, be sure to use a sharp blade so you don’t get a ragged edge.
I loved using the Fiskars Detail Craft Knife with Easy Change Blade for this step.
At the same time, you should also use a straight edge, like this 10-inch Straight Edge Paint Guide and Smoother as a guide for the blade to get a neat line at the ceiling and along the baseboard.
Mistake #9: Sweating the Small Stuff
While I installed this wallpaper, I had an epiphany.
First, there’s no such thing as perfection on this side of heaven!
Sometimes my seams weren’t perfect.
Sometimes the patterns on the paper didn’t line up further down the paper, even though they were perfect at the top.
When you look at things too closely, you can get caught up in those imperfections.
But when you step back and look at the full project?
It looks pretty darn amazing!
Basically, it’s a lot like life, isn’t it?
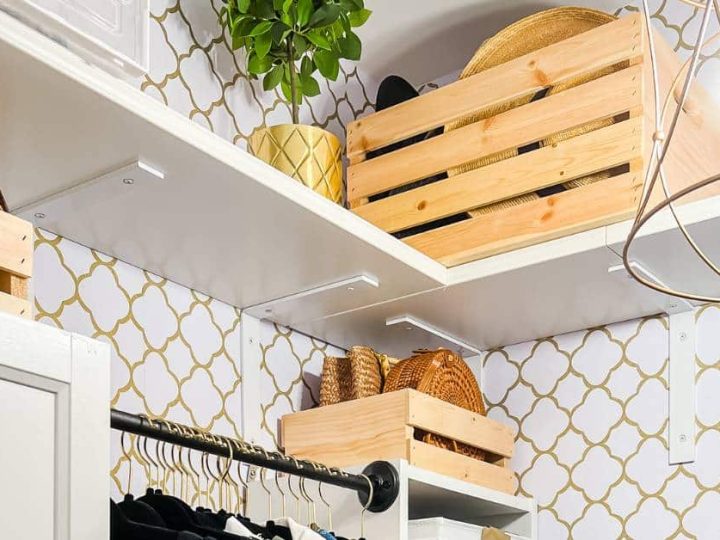
Before and After Hanging Wallpaper

The best part of any DIY project is comparing the before and after results, don’t you think?
Adding peel-and-stick wallpaper to this small closet makes it lighter and brighter, while also adding some style.
It also helps the awkward bump-out to blend in better with the background.
I have a great idea for this back wall and can’t wait for you to see how this all comes together!
Anne's small walk-in closet was unfunctional, crowded, and ugly. Follow along as she turns it into a well-organized space that's pretty too.
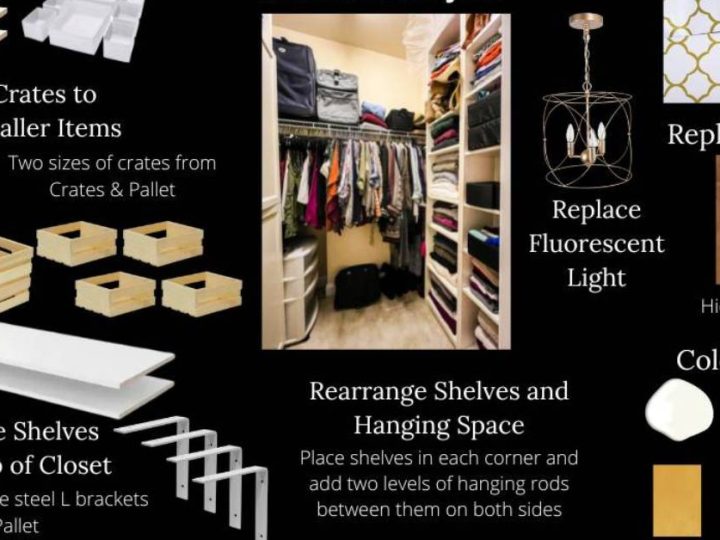
Plan to Make a Small Walk-in Closet More Functional and Stylish
Check out all the plans to make Anne's small walk-in closet both functional and stylish!
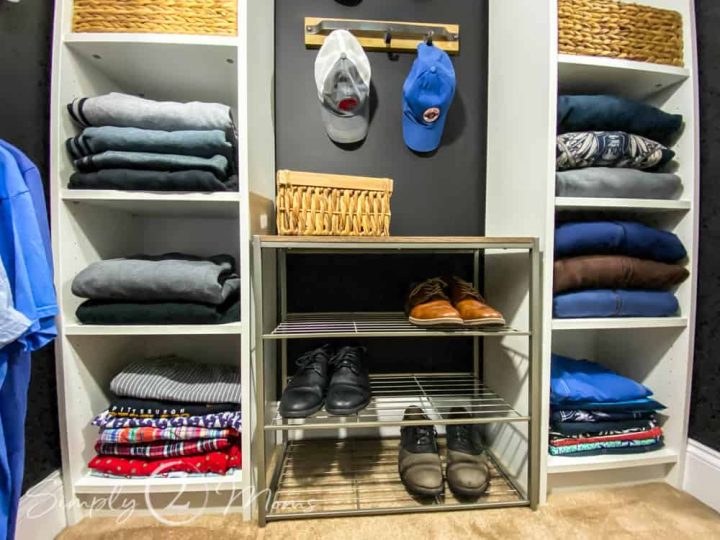
How to Increase Storage Space in Your Closet
Do you have unused space above the hanging rods in your closets? Learn how to install a shelf in that space to add more storage.
Don’t Make These 9 Mistakes With Peel-and-Stick Wallpaper
Want to give your closet a boutique feel? Try peel-and-stick wallpaper! It's easy to hang if you follow these tips.
More Closet Ideas and Inspiration from Simply2Moms
Check out these posts for even more tips and tricks for updating a closet!
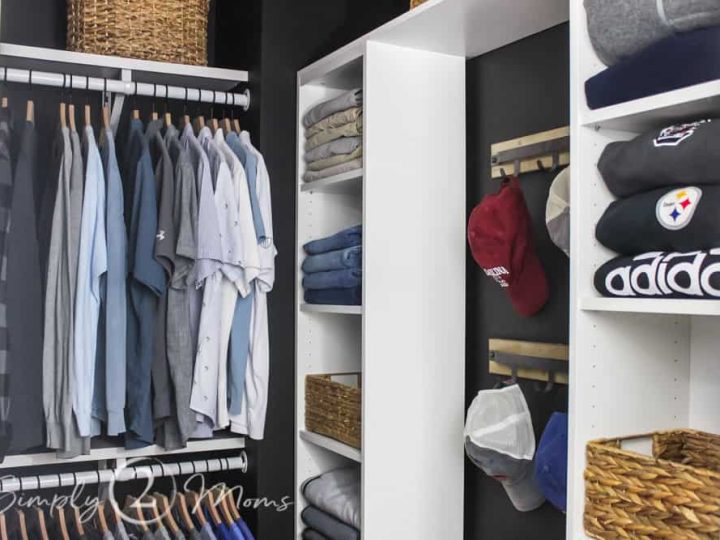
How to DIY a Main Bedroom Closet for Less than $250
Check out how AnnMarie updated her husband's small walk-in closet! She also used Billy bookcases from IKEA plus additional hanging solutions.
7 Quick Ways to Organize a Small Walk-in Closet
Get your closet organized with these functional and stylish ideas.
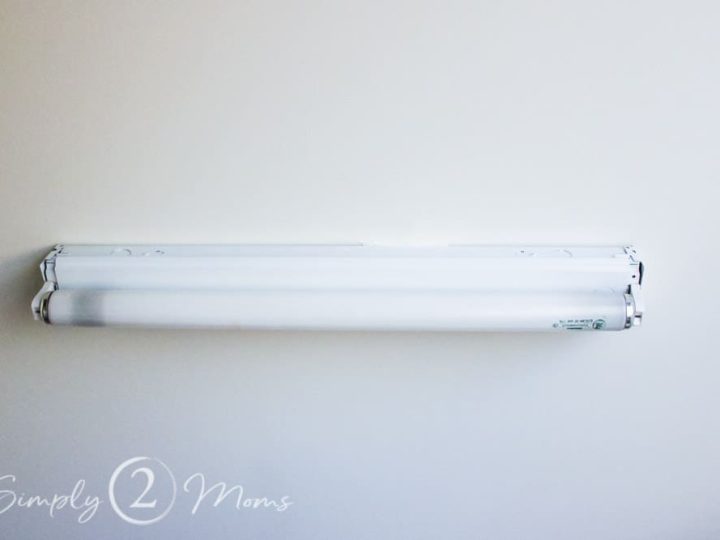
How to Replace a Fluorescent Light Fixture with Regular Light Fixture
Many builder-basic homes have fluorescent light fixtures in their closets. Learn how to swap out these unattractive lights for something more stylish.
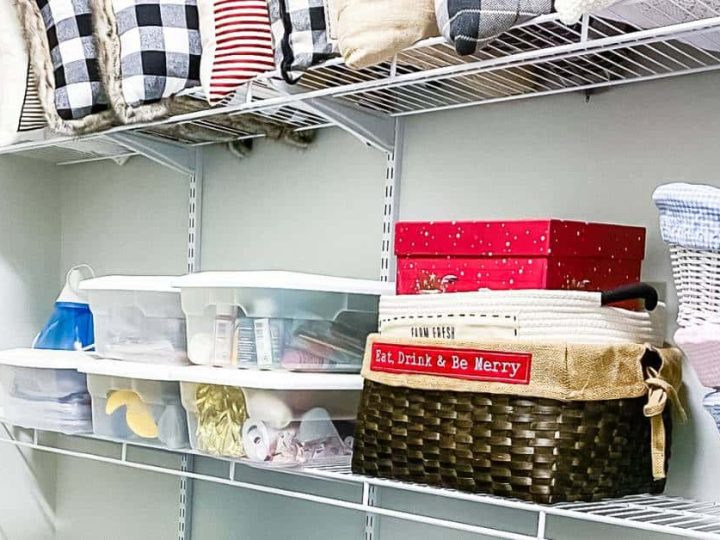
How to Make a Storage Closet More Organized and Functional
These storage ideas are great for any closet!
Resources and Supplies

Click on any image to shop items from this post

Sources: Wallpaper Installation Set | Titanium Craft Scissors | Detail Craft Knife with Easy Change Blade || Tape Measure | Seam Roller | (not pictured) 10-inch Straight Edge Paint Guide and Smoother | Replacement Craft Knife Blades | Straight Edge Smoother with Felt Edge
If you have any questions or suggestions, contact me or leave a comment!
Don’t miss any of our tips, tricks, or stories!
We’d love for you to follow us on social media! You can find us on YouTube, TikTok, Instagram, Pinterest, and Facebook.

Pin it to Remember it!

Great tips Anne! I love peel&stick wallpaper…perfect for this Libra who changes her mind often!!
Thanks, Jennifer! Peel and stick is definitely one of the easiest ways to change your mind when it comes to DIY projects!
Your closet looks great. I love peel and stick wallpaper. Hugs to you.
I’m so jealous of Anne’s closet. I need to get on the ball and get mine done now! lol
Great post! I’ve been entertaining the idea of peel & stick, Anne, I think you just sealed the deal 😁. The tools you used are also great.
Have a wonderful day! Yay!! It’s Opening Day!⚾⚾
Oh good! I’m so glad I convinced you to give it a try. You’ll have to share a picture with your results! As for Opening Day? WOOO HOOO! Bring on the boys of summer!