
How to Hang a Gallery Wall in Minutes with 3M Claw Hangers
Do you want to hang photos in your home but don’t want to use nails or adhesive strips? Check out this ingenious solution for hanging on drywall: 3M claw hangers.
AnnMarie and I have slightly different preferences when we decorate our homes, but there’s one thing we always agree on:
We love to decorate our walls with photos!
Sure, you’ll see some word art and mirrors, but gallery walls are still our favorite way to decorate our walls.
Scroll down to the end of this post to see some of the places we’ve put them.
Over the years, we’ve learned some tips and tricks that make hanging family photos easier.
We really like using 3M Command Strips, but recently I’ve had some issues with them.
The adhesive strip broke on several of them while I was removing them and it ended up pulling paint off my fireplace mantel.
Another strip pulled off some of my drywall which is going to require spackled and sanding before I can repaint it.
And one of my picture frames fell off my entryway gallery wall and a new strip wouldn’t stay adhered.

I’ve wanted to hang a gallery wall over my bed with photos of my husband and I over the past 30 years.
However, after my recent experiences, I wanted to try something besides adhesive strips.
After all, I don’t need something falling on our heads while we’re sleeping!
While I was at our local hardware store I discovered these 3M Claw Hangers and decided to give them a try!
There was some trial and error along the way, and I’ll be sharing everything I learned to get great results.
Posts on Simply2Moms may contain affiliate links which means we may earn a small commission on purchases at no extra cost to you. As an Amazon Associate, I earn from qualifying purchases. You can read our full disclosure policy here.
What is a Gallery Wall?
Before we get started, let’s talk gallery walls.
The idea of gallery walls isn’t a new one.
For years they were referred to as salon walls.
Generally, they’re a grouping of framed photos, artwork, and memorabilia hung together on a wall.

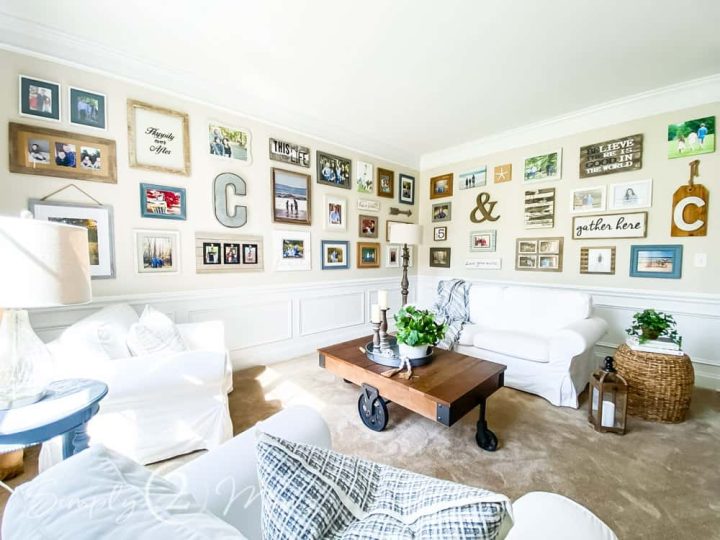
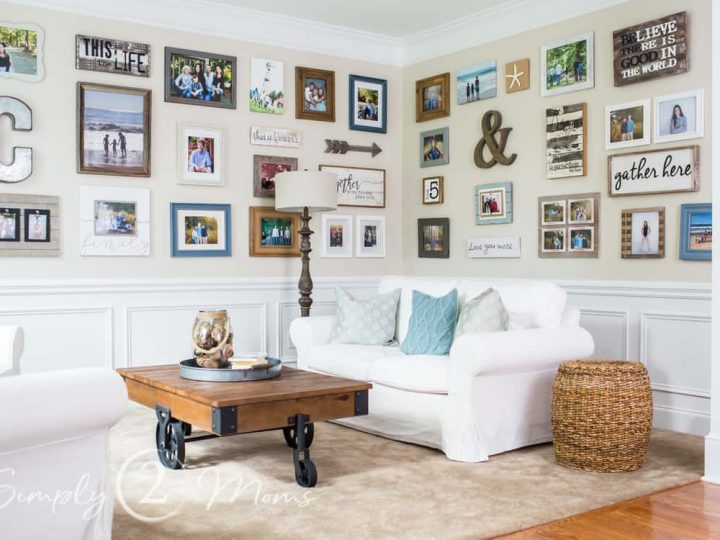
AnnMarie created a large, wrap around display that spans two walls in the front room of her home!
This is a great example of a wall that includes more than just photos.
She unified the look by choosing frames and other items that all coordinate.

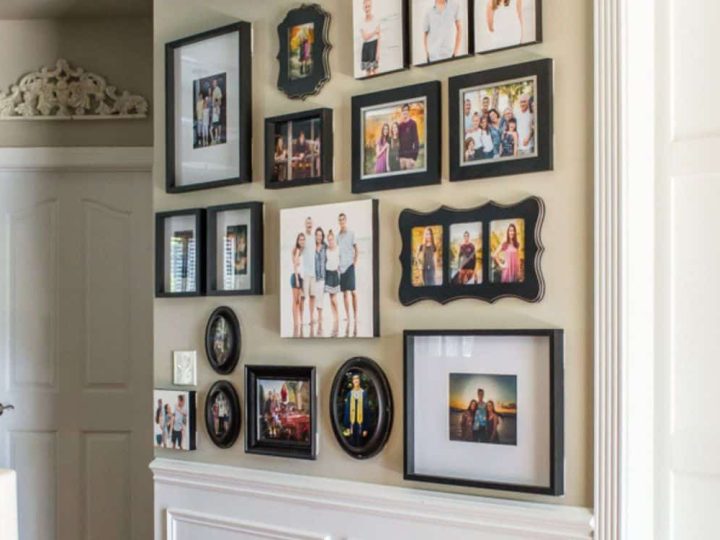
I have several small photo displays in my home like this one in my entryway.
This one has a variety of shapes and styles of frames, plus some canvases, but they’re all unified by the color of the frame.
Incidentally, it’s the small photo on the bottom with my kids on a red tractor that kept falling off the wall…
I’ve re-hung it using a claw hanger and it’s doing great!
Of course, all the other images on my wall have been holding strong for years now, so maybe it was just a fluke with the one photo.
Why Use 3M Claw Hangers?
The 3M claw hanger works based on simple physics.
If you ask my dad, a former physics teacher, everything is physics… 😉
They’ll hold up to 15 pounds and only make tiny little holes in your drywall.
No tools are required to install them, but I always recommend using a level.
There are three other sizes that will support 25 pounds, 45 pounds, and 65 pounds.
You don’t need to worry about finding studs or using anchors, even with the heavy duty loads!
If you have textured drywall, you haven’t been able to use adhesive strips to hang things, and these claws are the perfect solution.
A few other things to remember:
- the claws can be reused as long as they aren’t damaged when you remove them
- they’re only for hanging pictures, mirrors, and other things that don’t stick out more than three inches from the wall so they don’t work for hanging shelves (it’s because of physics)
- you can use them on walls that have wallpaper on them
- they don’t work on any kind of wall except drywall
Materials Needed for this Photo Gallery Wall

The best part of this project is how little you need to get it done!
This is what I used:
- Set of 12 square metal photo frames (12×12 matted to 8×8 openings)
- Two packages of 3M Claw Hangers with 15-lb weight load
- Acid-free tape for matting photos
- Tape Measure
- Level
- Yard Stick
- Photos
What Not to Do When Using 3M Claw Drywall Hangers
Some of the Claw hangers include a spot marker, a foam block that’s adhesive on both sides to help you figure out where to install it.
The package insert said to use it for sawtooth hangers, wire hangers, or D-ring hangers.

The set of frames I bought are lightweight metal frames: they’re going over my bed and I wasn’t taking any chances!
They don’t have any of those mechanisms for hanging, they just have a lip around the outer edge.
I tried using the spot marker, thinking the lip was basically the same thing as a sawtooth hanger.

And I was wrong. LOL
After I got the first four frames hung, I realized that the spot marker wasn’t getting them level.
So my husband helped me figure out an alternate way to install them and get perfectly even space and nice even lines!
Step-by-Step Tips for Hanging Frames with 3M Claw Hangers
1. Measure the wall where you’re hanging the photos.

Any time you’re hanging a gallery wall, the very first thing you need to do is measure the space where you plan to hang the photos.
You need the width and the height.
I wanted to center my grid over my bed.
Since I’m planning to install coffers in my ceiling, I made an allowance for that when I measured the height.
Add up how wide all of your frames are for a single row.
Then figure out how much space to put between each frame and add that to get your width for the display.
Now, subtract that from the total width you have available on your wall.
Divide that number in half, and that’s how many inches you need to come in on each side.
Repeat the process for the vertical dimensions to figure out how much space to leave on the top and bottom.
2. Mark the outer edges of the photo wall.

Once you have the measurements from the step above, use tape to mark those outer edges.
You can mark it with a pencil too.
When I started this project, we’d recently painted the walls and I didn’t want to put any marks on them.
So I used tape.
Of course, once I realized my frames were uneven, I stopped being quite so particular.
There are pencil marks alllllllllll over my wall now!
But you can’t see any of them so it’s like they don’t exist.
3. Put photos in the frames and figure out the arrangement.

These photo frames are 12×12 with 8×8 openings in the mats.
To get the photo to display perfectly in the opening, I ordered my photos as 8×8 squares.
This gave me control over where the crops occurred.
You’ll need to use adhesive to hold the photos in place inside the opening.
Resist the urge to use whatever tape you have on hand because it will end up ruining your photos!
Always, always, always use acid-free tape on photos.
I keep a roll of this tape on hand that’s designed specifically for matting photos.
It’ll last forever and it’s less than $7.
Then pre-arrange the photos in the order you want for them to be displayed.
A few things to keep in mind when arranging them:
- Space out lighter and darker images
- Spread out colors so one particular color isn’t all in one space
- Decide whether you want images to be chronological or mixed up
I really like using visual triangles when I’m putting together a photo display. Arrange the same colors so they’re points of a triangle. This works for lighter and darker images too.
Visual triangles will keep your eye moving through a photo wall display.
4. Install the first 3M Claw hanger and mark level lines.

Once I placed my first claw, I used a level to draw a vertical line.
Then I used that line to make sure the claw that went above for the next row was level with the bottom row.
I also leveled the photo frame when it was hanging on the claw and marked the top of the frame.
This helped me place the other claws in the row in the right spot so that the whole row stayed level.

It’s easier to see what I mean with these pictures once I have more frames installed.
I used a combination of a yardstick and a level to keep the rows level.
After hanging a frame, I marked a level line, and then used it to find where the top of the next frame should go.
Then I’d measure from the center of the claw over the correct length to the center of the next claw.

Before installing the next claw, I took the frame off the lower row and then used the yardstick and level again to make sure that the next claw hanger was placed in the right spot vertically.
When you’re hanging a grid patterned photo wall, it’s important to keep everything level and evenly spaced.

I had a 3.5-inch piece of trim left from another project that I used to doublecheck my spacing.
It really helped me to make sure the spaces were perfect!

That little piece of wood also came in handy to press the claw hanger all the way into the drywall!
While no tools are needed to install each claw, my hands aren’t super strong.
My husband could easily press the claw in place with his thumb, but I feel like I was able to get it more flush when I used the wood to press on it.

Now, the wall over my bed is filled with some of my favorite pictures of my husband and I over the thirty years we’ve been together.
It’s a visual reminder of trips we’ve taken.
Concerts we’ve seen.

Anniversary celebrations.
And even our wedding day.
There are photos of our kids all over our house, but this wall is reserved for just the two of us.
Because sometimes it’s easy to forget how beautiful the story of us was and still is.
Of course, I may need to plan another wall at some point so I can include photos of the years we hopefully still have ahead!

Every DIY project needs a good before and after, so here’s how the wall over our bed went from blah to wow in about an hour!
I’m really happy with how the 3M claw hangers worked for this gallery wall.
They were quick and easy to use once I figured out how to use them with the metal photo frames.
Gallery walls are such a great way to decorate in your home!
All you need are a few simple tools and a little bit of time, to install a photo wall filled with memories.
More Ideas for Creating Photo Gallery Walls
Tips and Tricks for Hanging Gallery Walls
Here at Simply2Moms, one of our favorite ways to decorate our homes is with photos of the people we love. Over the years, we've hung a number of gallery walls in our homes and we've learned a lot along the way! We've rounded up our best tips and tricks for you
7 Hacks for Hanging the Best Gallery Wall
Intimidated about how to put together a gallery wall? We've got you! We're sharing all our tips from planning to installation in one place.
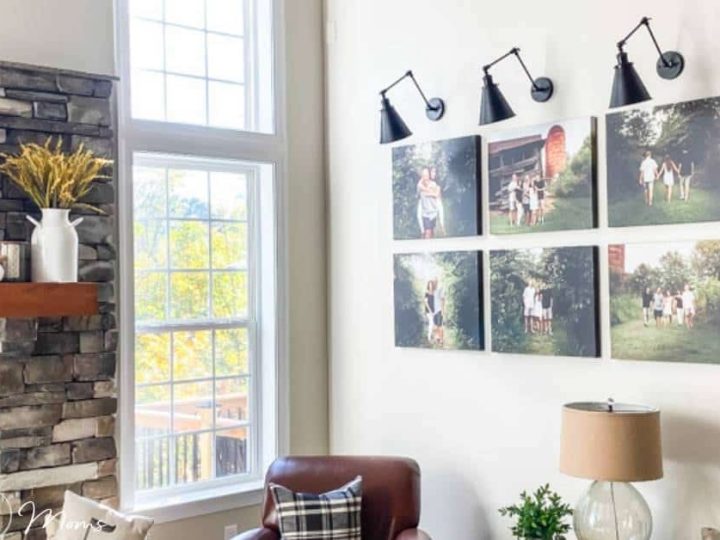
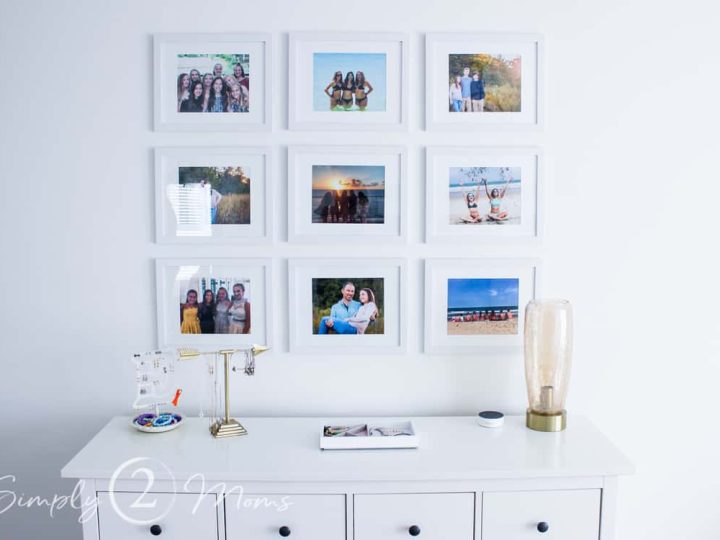
How to Design an Easy Canvas Gallery Wall
Gallery walls don't need to be complicated. Display large coordinating images from a photo session on a prominent wall and add drama with lighting.
How to Plan and Install a Front Entry Gallery Wall
Greet visitors with a gallery wall in an entryway using a mixture of framed photos and gallery-wrapped canvases.
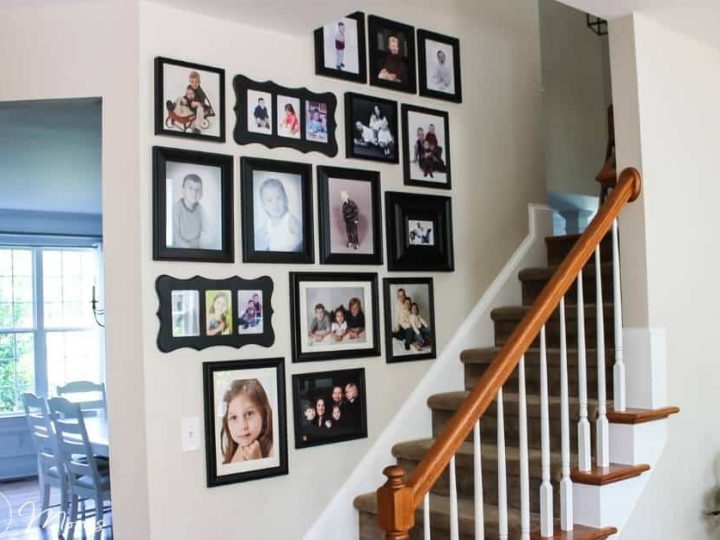
How to Hang the Best Staircase Gallery Wall in 3 Easy Steps
Decorating the walls on stairs can be a challenge. Make it easy with a gallery wall with a mix of frames.
How to Create a Large Farmhouse Gallery Wall
Make a big impact with a large scale gallery wall filled with a variety of family photos, meaningful quotes, and decorative wall art.
Teen Girl Bedroom Makeover | Gallery Wall
Decorate a teen's bedroom with a meaningful wall display of photos of friends and family.

Click on any image to shop items from this post

Sources: Set of 12 square metal photo frames (12×12 matted to 8×8 openings) | Two packages of 3M Claw Hangers with 15-lb weight load | Acid-free tape for matting photos | Tape Measure | Level | Yard Stick
If you have any questions or suggestions, contact me or leave a comment!
Don’t miss any of our tips, tricks, or stories!
We’d love for you to follow us on social media! You can find us on YouTube, TikTok, Instagram, Pinterest, and Facebook.

Pin it to Remember it!

Those are cool, I haven’t seen them before! Lately I’ve had the same experience w Command strips and I’ve used them for years too… ripped off a big strip of drywall paper & same with them taking off paint!
Ugh it’s so frustrating. You’ll have to give these a try!
I love each of your gallery walls! So much inspiration! I need to get my pictures hung and the idea of the ‘claw’ is excellent! I have a blank wall staring at me as I type! haha Thank you for sharing!
Thank you so much, Susan! Can’t wait to see your wall when you do it!
Looks Amazing. I am going to have to try these next time I hang a wall gallery.
Thanks so much, Wendy! I’m really impressed with them!
It looks amazing! I’m definitely going to try the claws. Great idea.
Thanks, Renae! I really think you’re going to like them!